1-800-355-2335 |
Mon-Fri: 7:30am - 4pm EST |
Contact Us
Bufftech Imperial Vinyl Fence Panels
Item # IMPERIAL-S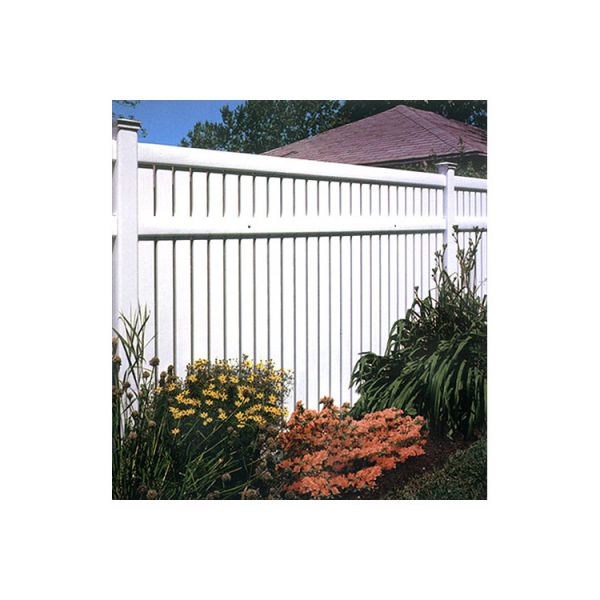
Details
Details
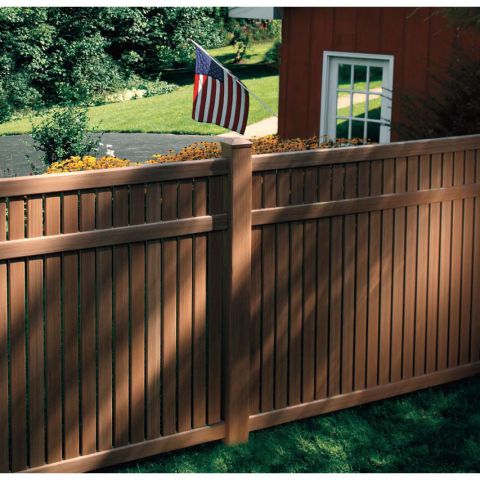
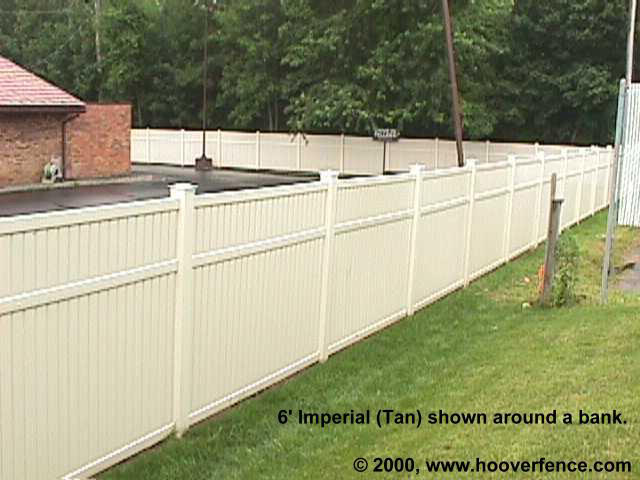
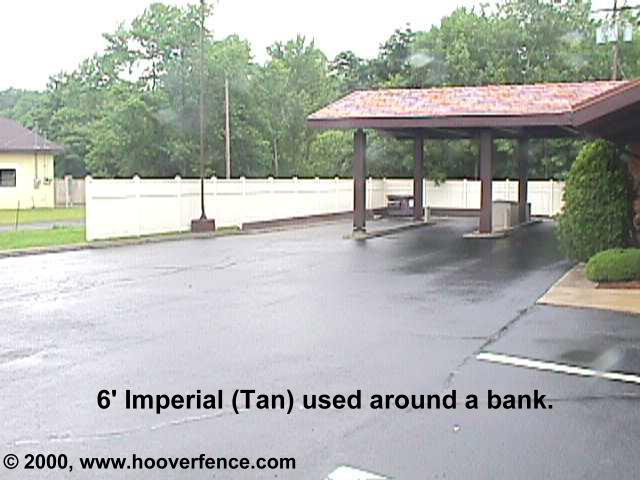
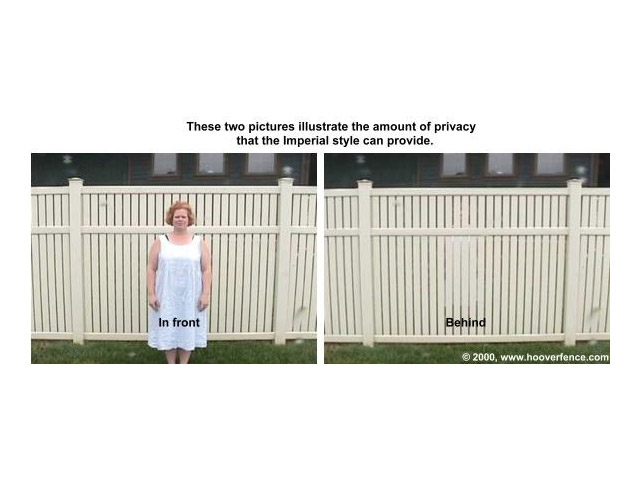
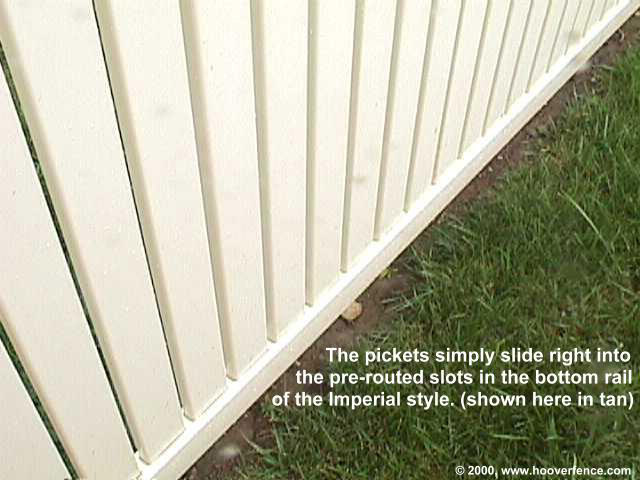
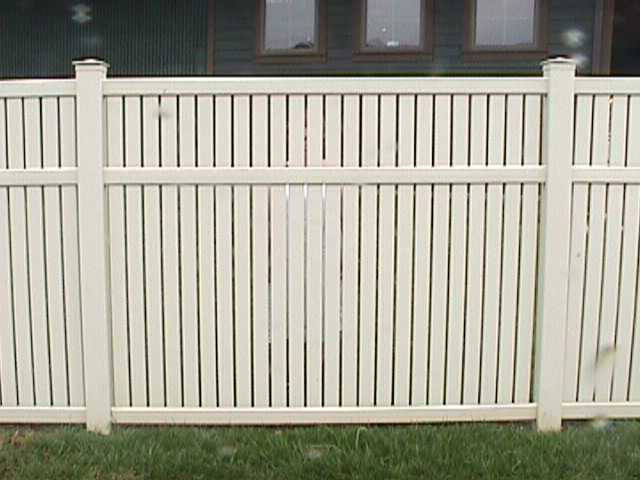
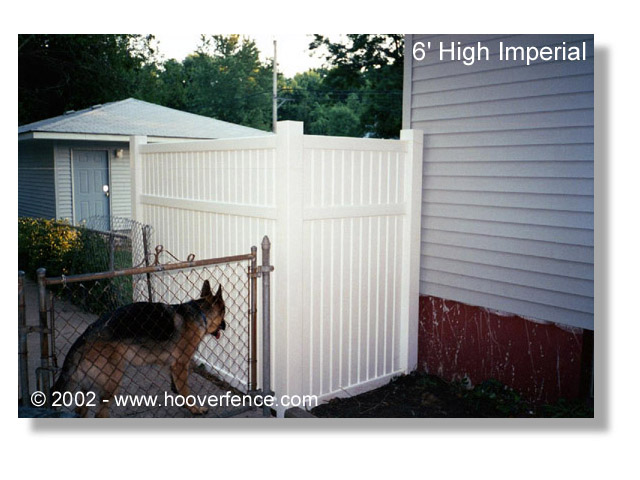
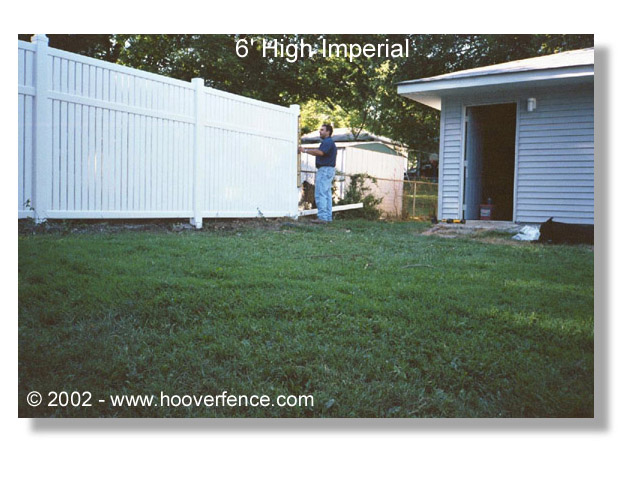
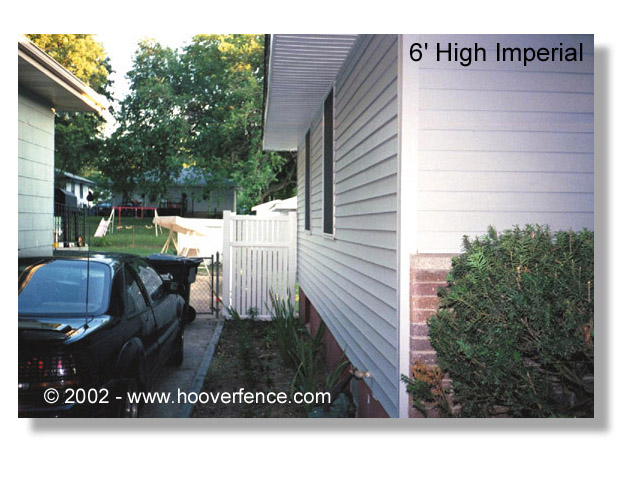
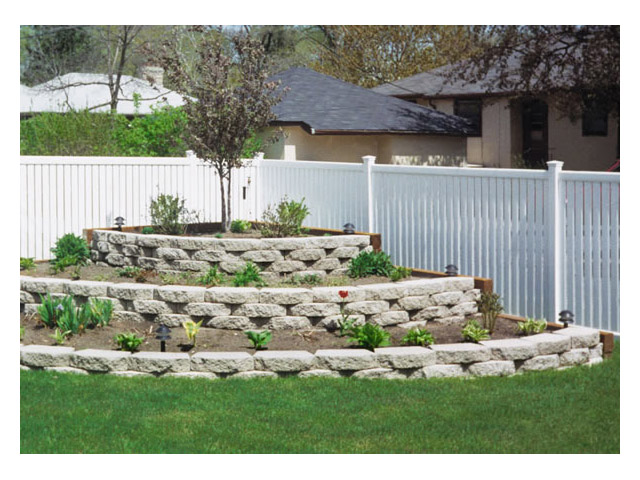
The Imperial style features a smooth finish. The Imperial vinyl fence is ideal for a semi-private fence. The narrow spaces all but block the view, especially at angles, as you can see in the pictures, while at the same time allowing some air to move through the fence. For that reason, this style is a better choice than a solid vinyl fence in high wind prone areas. This style is available in 4', 5' and 6' heights. A steel reinforced bottom rail prevents sagging. The steel rail is hidden inside the vinyl rail. Optional aluminum rail available for extremely corrosive environment. The 4' heights have two horizontal rails, 5' and 6' heights have three horizontal rails. This vinyl fence in all heights used with the Magna Latch meets BOCA pool safety codes. Sections are capable of raking out of square to follow grades (see specs). Sections include rails and pickets. Posts and post caps sold separately.
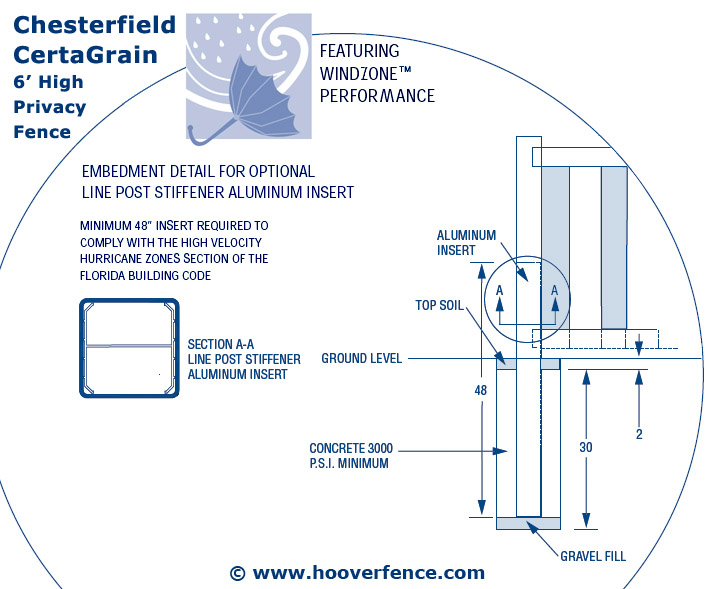 WindZone™ Performance: Miami-Dade County-approved for exceptional performance in high wind conditions. With optional components, this style in 6' height meets the Florida building code for hurricane zones. Recommended for areas that frequently experience high velocity winds. More Info.
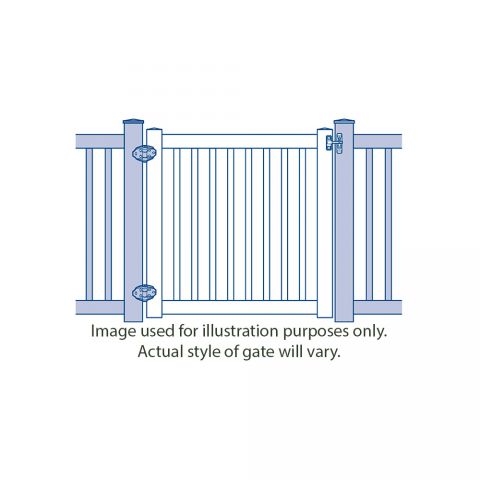
Matching Gates available.
Specifications
Specifications
Bufftech WindZone Performance - Miami-Dade NOA Code Approval (PDF)
Section Width: 8'
Heights: 4', 5', and 6'
Picket Size: 7/8"x 3"
Picket Spacing: 7/16"
Rails: 2x4 (actual 1-3/4" x 3-1/2", 5' and 6' heights have middle rail)
Steel Rail Channel: bottom rail
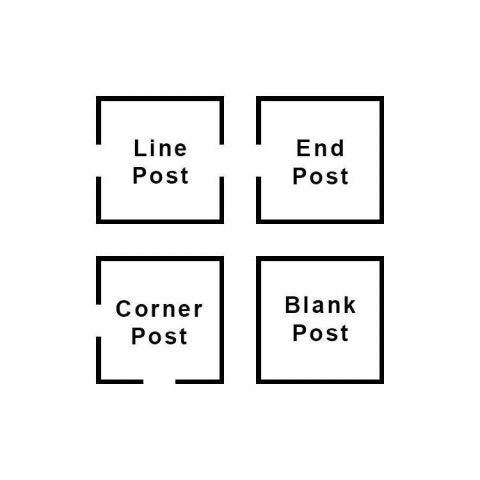
Post Size: 4'H = 4"sq., 5'H+6'H = 5"sq. (choice of caps)
4' High Sections - Specifications
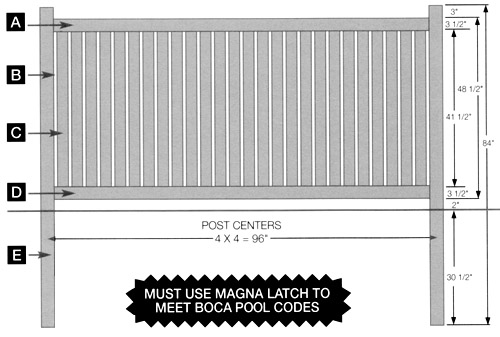
Top Rail (A): 2" x 4" x 95-1/2" Routed to accept pickets (clay section includes steel channel)
Picket Spacing (B): 27 spaces of 9/16"
Pickets (C): 26 pieces of 7/8" x 3" x 48"
Bottom Rail (D): 2" x 4" x 90" Routed to accept pickets. Includes steel channel. Drain holes are pre-drilled.
Steel reinforcement: Yes-channel located in bottom rail (steel channel in top and bottom for clay color sections)
Aluminum reinforcement: Optional
Post (in-ground) (E): 4" x 4" x 84"
Post Spacing (center to center): 96"
Color(s): White, Clay, and Almond
5' High Sections - Specifications
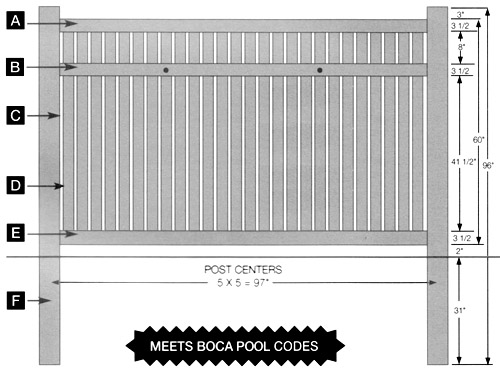
Top Rail (A): 2" x 4" x 95-1/2" Routed to accept pickets (clay section includes steel channel)
Middle Rail (B): 2" x 4" x 95-1/2" Routed clear through to accept pickets
Picket Spacing (C): 27 spaces of 9/16"
Pickets (D): 26 pieces of 7/8" x 3" x 59-5/8"
Bottom Rail (E): 2" x 4" x 95-1/2" Routed to accept pickets. Includes steel channel. Drain holes are pre-drilled.
Steel reinforcement: Yes-channel located in bottom rail (steel channel in top and bottom for clay color sections)
Aluminum reinforcement: Optional
Post (in-ground) (F): 4" x 4" x 96"
Post Spacing (center to center): 97"
Color(s): White, Clay, and Almond
6' High Sections - Specifications
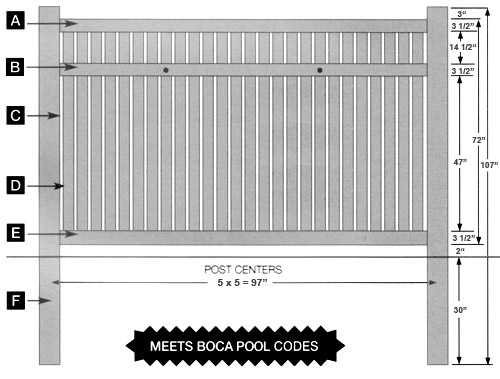
Top Rail (A): 2" x 4" x 95-1/2" Routed to accept pickets (clay section includes steel channel)
Middle Rail (B): 2" x 4" x 95-1/2" Routed clear through to accept pickets
Picket Spacing (C): 27 spaces of 9/16"
Pickets (D): 26 pieces of 7/8" x 3" x 71 5/8"
Bottom Rail (E): 2" x 4" x 95-1/2" Routed to accept pickets. Includes steel channel. Drain holes are pre-drilled.
Steel reinforcement: Yes-channel located in bottom rail (steel channel in top and bottom for clay color sections)
Aluminum reinforcement: Optional
Post (in-ground) (F): 5" x 5" x 107"
Post Spacing (center to center): 97"
Color(s): White, Clay, and Almond
WindZone™ Performance: With optional steel reinforcement channel for top rail and aluminum line post stiffener kit, this style in the 6' height meets the Florida building code for high velocity hurricane zone areas.
Warranty
Warranty
Instructions
Instructions
Videos/Media
Videos/Media
Bufftech Catalog (PDF)
Bufftech Product Catalog (PDF)
Why choose Bufftech over other vinyl fence? (PDF)
Why choose vinyl over aluminum? (PDF)
Bufftech Top 10 Reasons (PDF)
Bufftech Quick Reference Guide (PDF)
Bufftech Consumer Guide (PDF)
Customer Photos
Customer Photos

Reviews
Reviews
There are no reviews yet. Be the first to Write a Review (requires login).
Shipping
Shipping
Shipping Expense Disclaimer: All orders are subject to confirmation. Additional shipping expenses, although rare, may apply due to weight, size, location, and/or other variables. Should your order require additional funds to cover the transportation of goods, you will be contacted prior to order processing for approval.
Parts for this product

You May Also Like