1-800-355-2335 |
Mon-Fri: 7:30am - 4pm EST |
Contact Us

How to Install Vinyl Gate Hinges
Read More: Vinyl Fence System Overview
The top hinge should be mounted so top of hinge lines up with the bottom of the top rail of the gate/fence. Bottom hinge should be mounted so the bottom of the hinge lines up with the top of the bottom rail of the gate/fence.
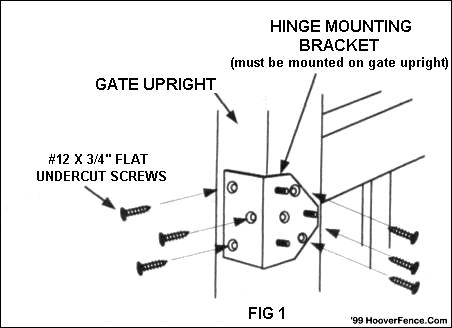
Figure 1
Step 1 - Position hinge mounting bracket on gate upright. Mark hole location on both sides of post.
Step 2 - Drill 3/16" pilot holes to accept screws.
Step 3 - Secure mounting bracket to gate upright with (6) # 12 x 3/4" flat undercut screws. (Figure 1)
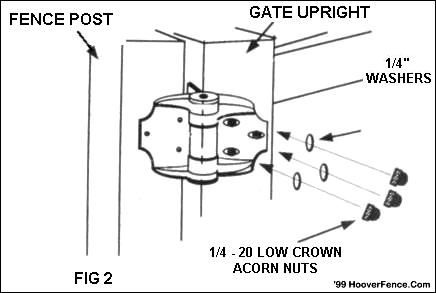
Figure 2
Step 4 - Position oval adjusting holes of the hinge over the threaded studs of the mounting bracket.
Step 5 - Secure hinge to mounting bracket with (3) 1/4" washers and (3) 1/4" low crown acorn nuts - Do not overtighten as hinge will need to be removed (Figure 2)
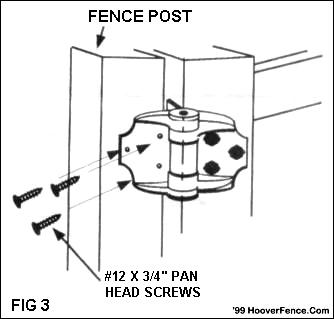
Figure 3
Step 6 - Position hinge against fence post, mark location of holes on front of post.
Step 7 - Drill (3) 3/16" pilot holes
Step 8 - Secure hinge to fence post with (3) #12 x 3/4" pan head screws (Figure 3)
Step 9 - Remove hinge from mounting bracket on gate upright.
Step 10 - Drill (3) 3/16" holes through leg of hinge in center of each square.
Step 11 - Mark location of remaining (3) screws on side of fence post.
Step 12 - Drill (3) 3/16" pilot holes. Secure hinge to fence post.
Step 13 - Reattach hinge to mounting bracket on gate upright, check for level.
Step 14 - Tighten acorn nuts. Repeat for second hinge.
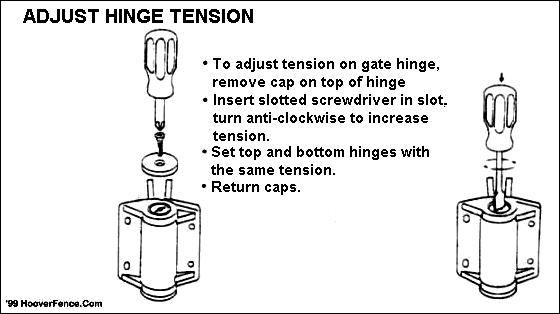
Figure 4
Note 1: Your hinges may or may not look like this hinge. Gate hardware can vary. All hardware includes installation instructions specific to that hardware. Follow the instructions for your hinges.
Note 2: Due to the constant upgrading of hardware supplied with the vinyl gates, the style of hinges supplied with the gate you receive may not match the style shown exactly. Full installation instructions will be included with the kit or pre-assembled gate.