
ZND Vehicle Gate Conversion Kit
Item # ZND-08052055
Details
Details
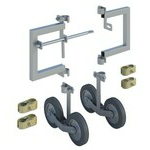
Vehicle Gate Conversion Kit (ZND-08052055)
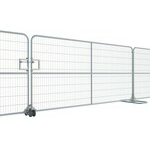
Tired of lifting and dragging temporary fence panels at your drive opening? Sick of locking up your jobsite with lengths of chain? The ZND Vehicle Gate Conversion Kit contains everything you need to convert ZND temporary fence panels into a double swing gate. All comonents in this kit will work with most 1-3/8" framed fence panels or gates.
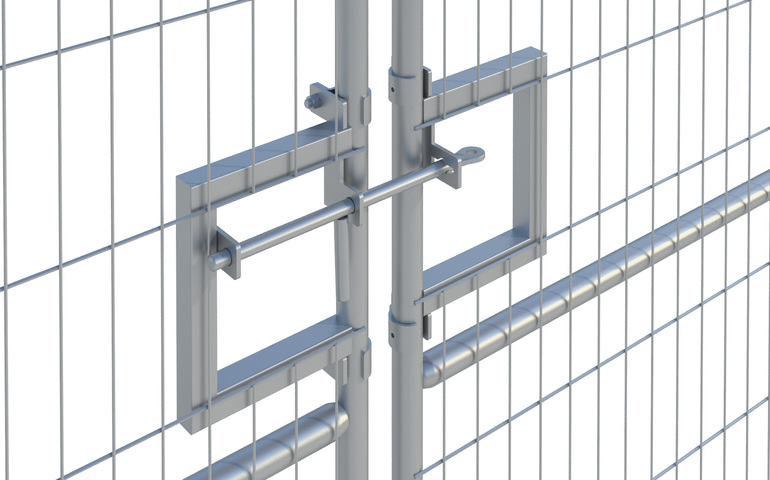
The ZND Gate Latch allows you to convert a standard 1-3/8" temporary fence panel into a swing gate with a lockable handle for ease of operation and simple security. The male latch portion comes with the latching pin that fits into the female component's catch, creating a positive engagement that keeps your gate closed, even under wind or movement. Use a padlock to secure this latch.
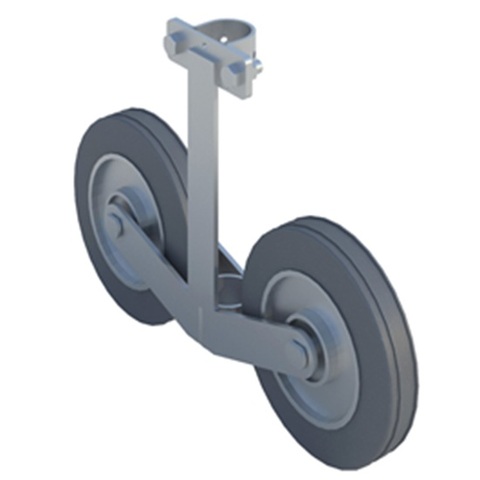
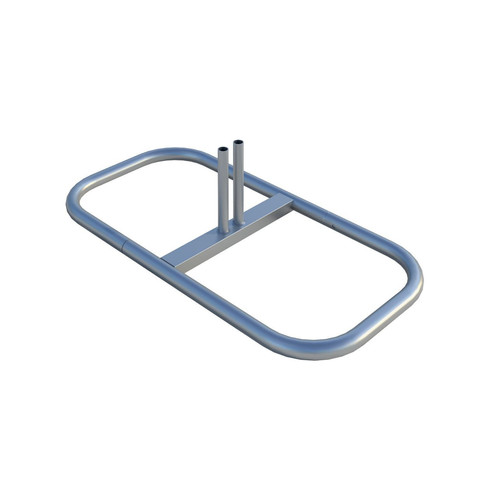
The Gate Wheel Assembly provides essential ground support for temporary fencing swing gates. It reduces strain on hinges and posts by supporting part of the gate’s weight, allowing for smoother and easier operation. Built for durability, this wheel assembly ensures reliable movement over uneven ground surfaces.
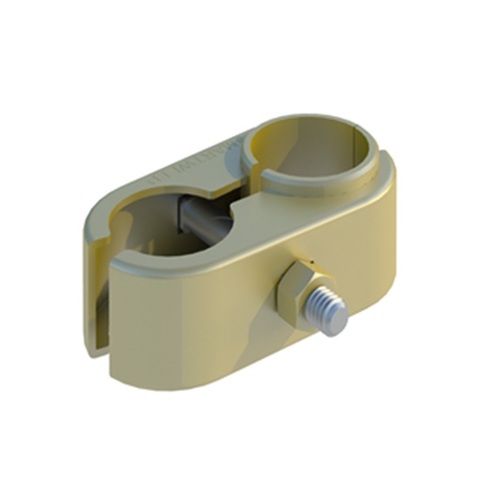
The Gate Hinge Coupler allows for precise alignment and strong load transfer; ensuring the gate functions smoothly and maintains stability under repeated operation. The precise alignment of this hinge will minimize common binding or sagging issues caused by standard saddle clamps.
- Vehicle Gate Conversion Kit Features:
- Each component has a corrosion-resistant finish for outdoor conditions.
- All components in the kit are also sold separately.
- If using ZND 6'H x 12'W panels, you will have a 24'W vehicle gate opening!
- Smooth opening with hinge couplers and gate wheels.
- Latch handle that is safe to operate and lockable.
- Vehicle Gate Conversion Kit Contents:
- Gate Wheel Assembly (09053010) (2)
- Gate Latch (male and female) (Gate-Latch) (1)
- Gate Hinge Coupler (09054090) (4)
- Panles and gates are sold separately.
Ordering Notes:
If your panels are 8'H, then you will need three hinge couplers for each gate leaf.
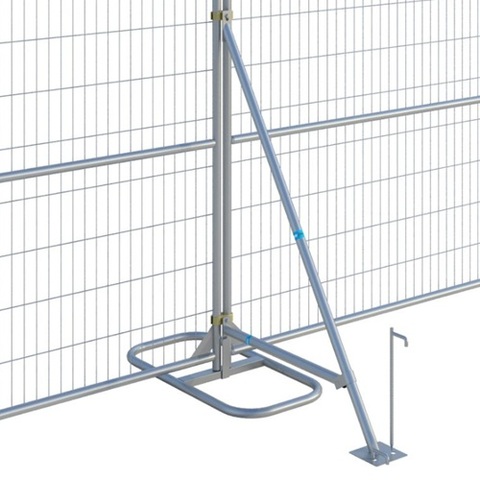
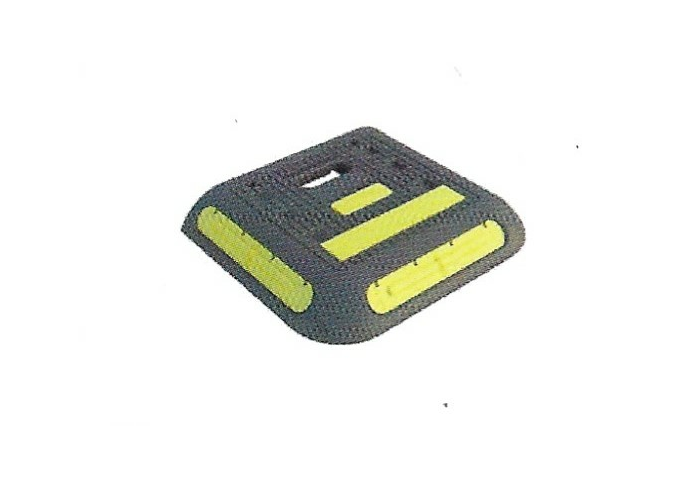
We recommend checking out the ZND Fence Stabilizer with Brace Kit (09551536), the ZND Z-Block (12551121-P), or the ZND Z-Weight (12551115-P) as a way to lend additional support near your vehicle gate opening.
Installation Notes:
To install the latch, you will need to cut an opening into your panel, then affix it by bolting the clamps into place around the frame. Make sure to remove all sharp edges after cutting into the panel wire. You will need 3/16" TEK screws or rivets (not included) to secure the clamps. Be sure to check allignment of the latch pin and latch catch before securing into place.
You will install one hinge coupler near the bottom of the panel and the other near the top of the panel. If you have an 8'H panel, then you will add a third coupler in the middle. The coupler has two openings: one with a collar and the other without the collar. The collar side of the coupler should attach to the "post" panel. Once the Couplers are in position, hand tighten the carriage bolt to secure in place. If the gate is in use often, be sure to check now and then that the carriage bolt is still secure.
The Gate Wheels will be added on the latch side of the panel. The panel leg will insert into the bottom opening of the gate wheel. Once seated, secure the wheel to the upright with the provided bolts and clamp. You will need to use 3/16" TEK screws or rivets (not included) to secure the clamps.
Specifications
Specifications
Instructions
Instructions
ZND Panel Assembly Guide (PDF)
Reviews
Reviews
There are no reviews yet. Be the first to Write a Review (requires login).
Shipping
Shipping
Shipping Expense Disclaimer: All orders are subject to confirmation. Additional shipping expenses, although rare, may apply due to weight, size, location, and/or other variables. Should your order require additional funds to cover the transportation of goods, you will be contacted prior to order processing for approval.


